
# Setup your Cutebot
To use the features of the Cutebot -- to make it drive around -- you will need to install an extension into your Micro:bit editor. First, start a new project. If you are in an existing project, click on the
 to go back to the main page, then click on the button, to start a new project. Let's call the program "Dizzy Bot". Then in your new project, click on the button.
In the extensions window, use the search bar at the top to search for "Cutebot", then select the Cutebot extension. When you return to the project page, your blocks menu in the middle of the should have a new  entry.
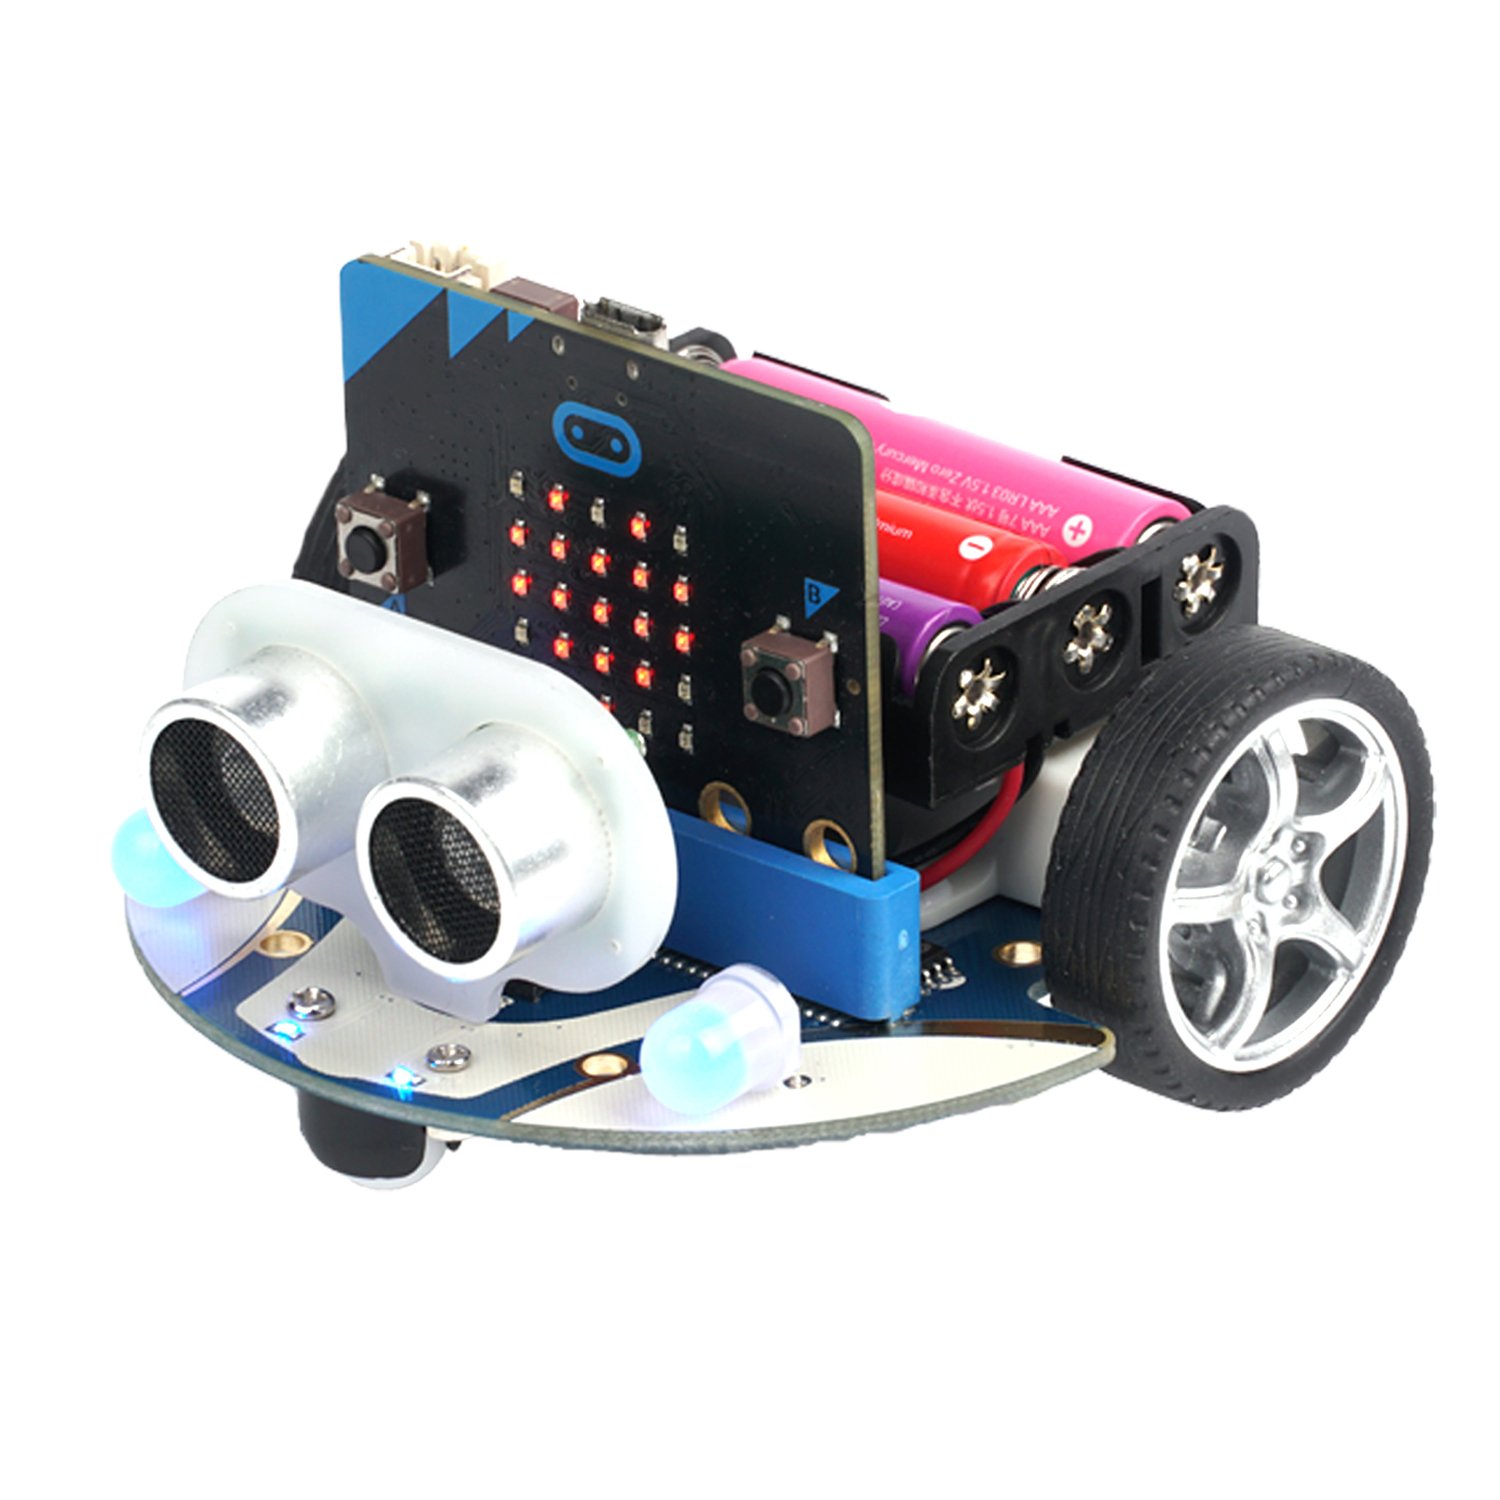
Now insert your microbit into the Cutebot. Make sure that the grid of LEDs of the Micro:bit is pointing toward the front.
Look on the back of the Cutebot for the switch:
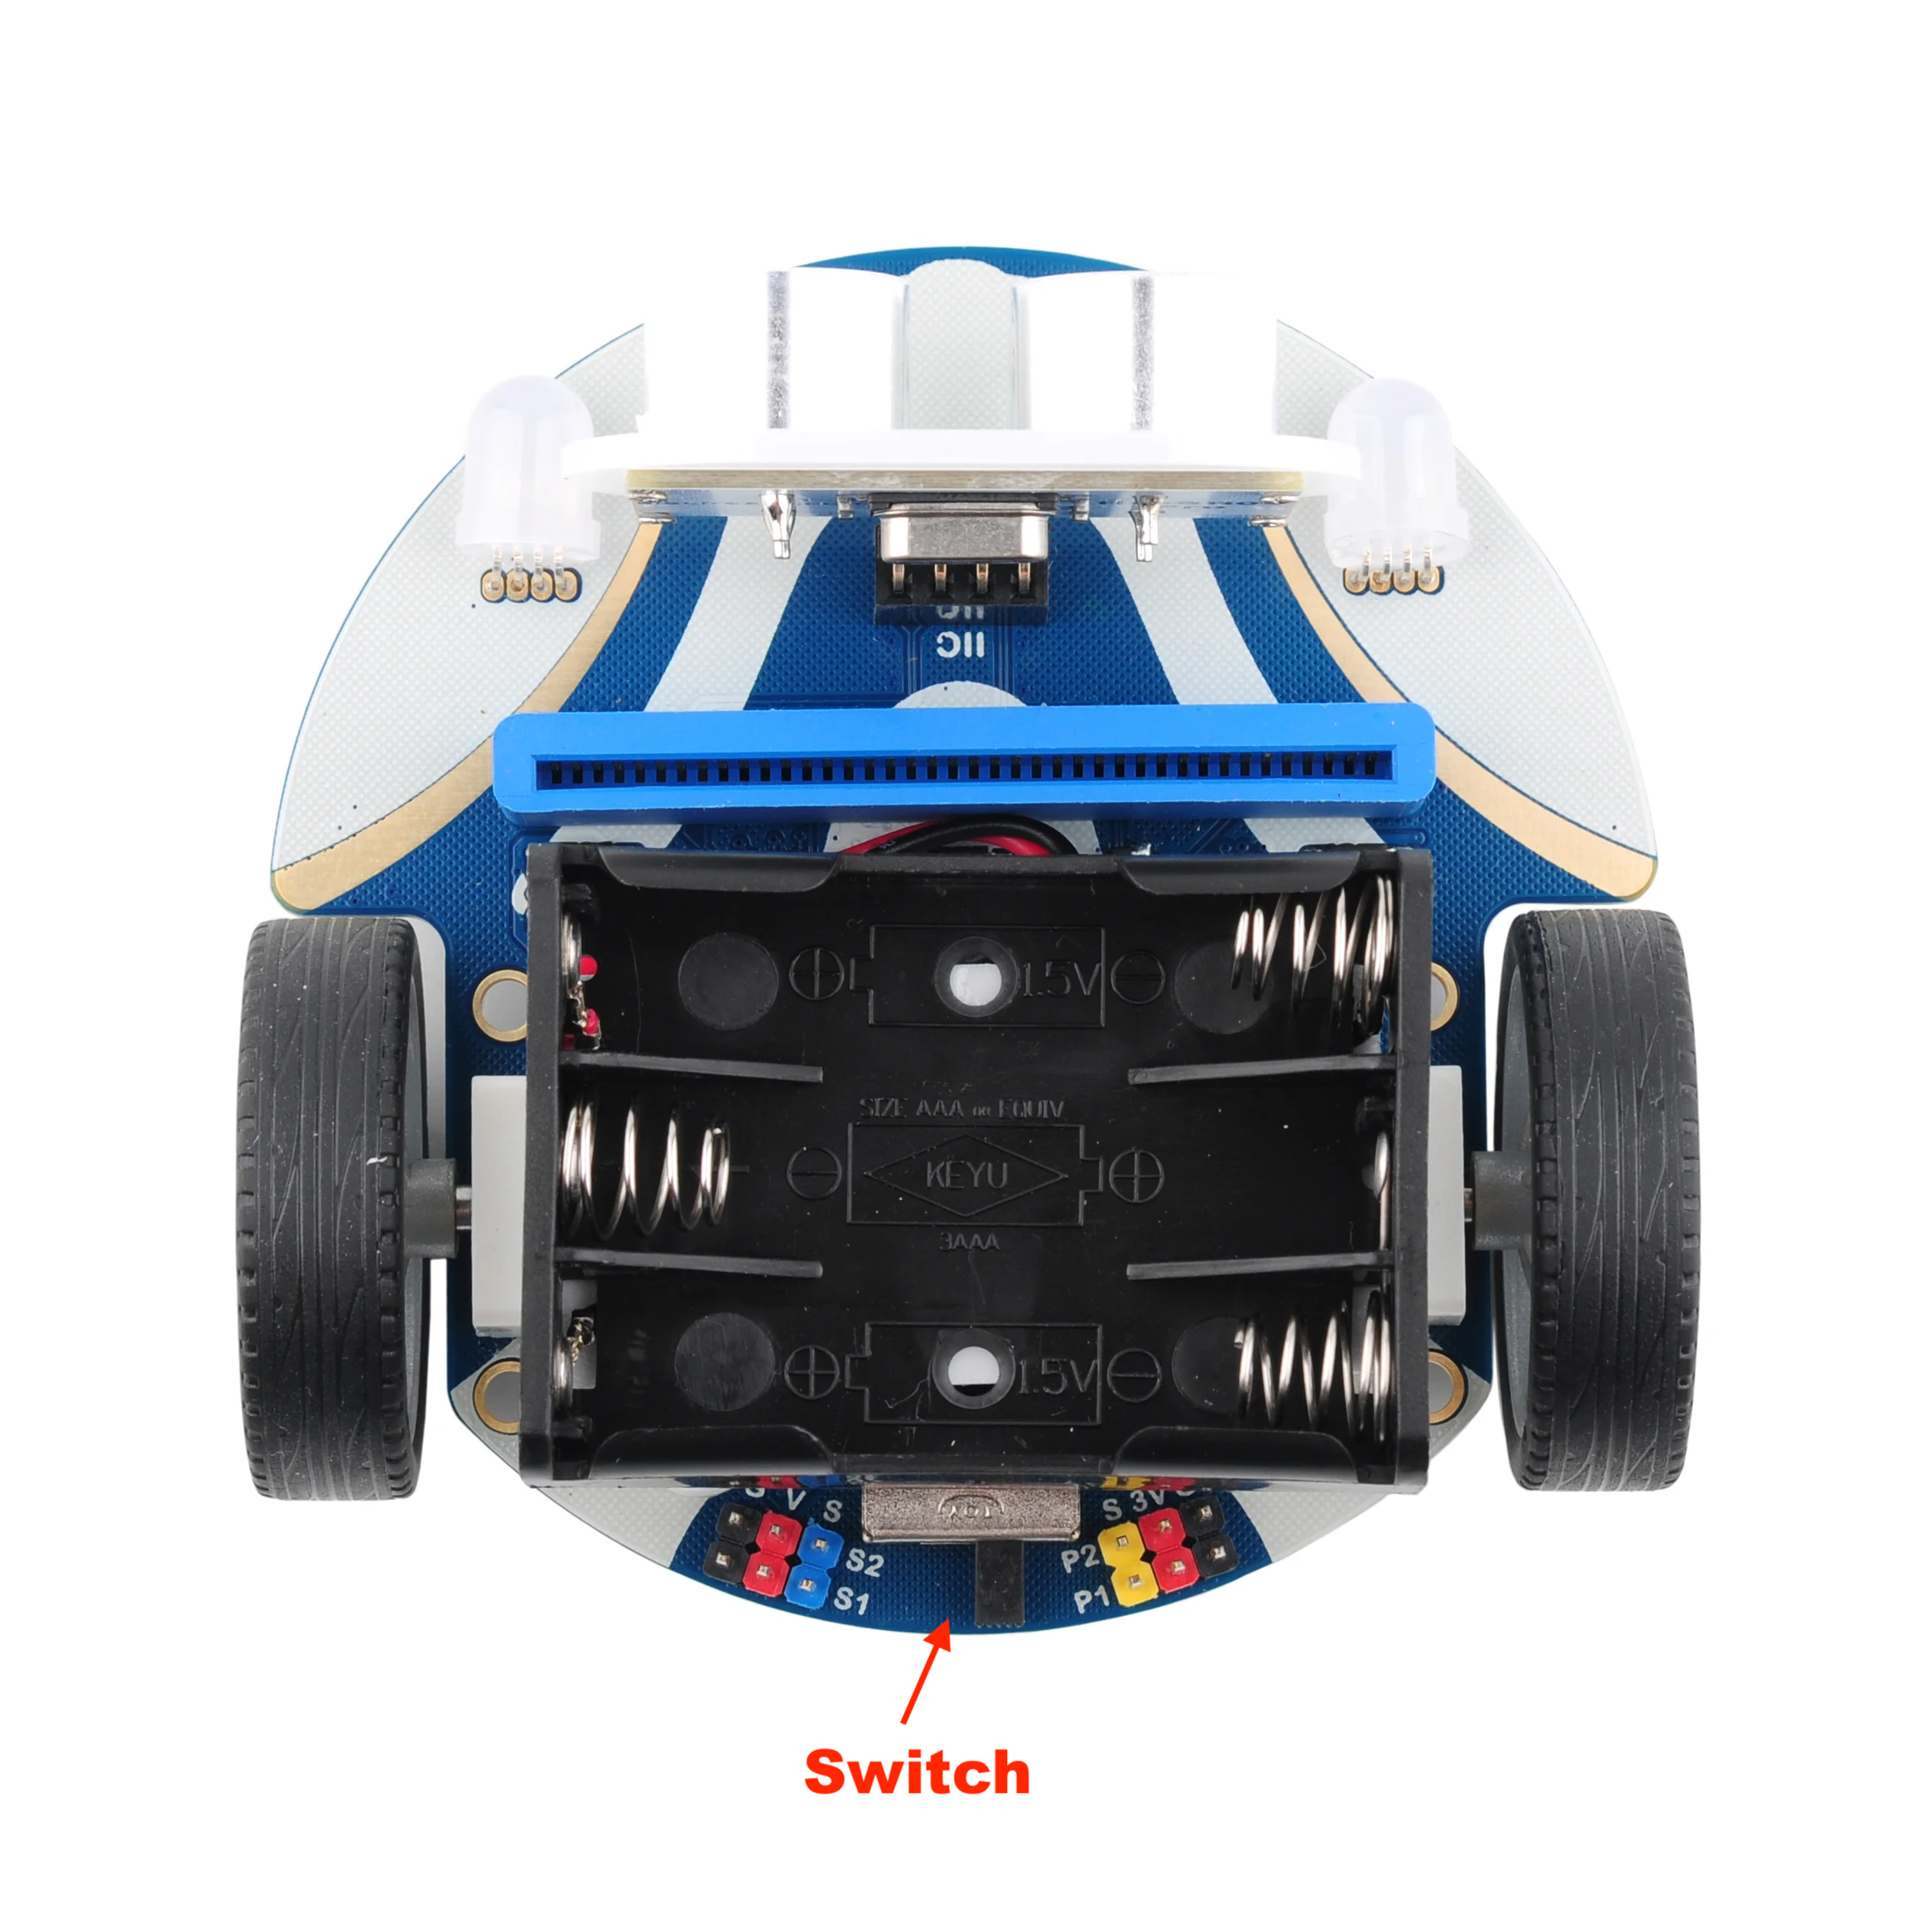
When you are programming the Cutebot, or anytime you don't want it to move, you should turn the switch off. The Cutebot will get some power when it is plugged into USB, but not as much as when the switch is on.
# First Program
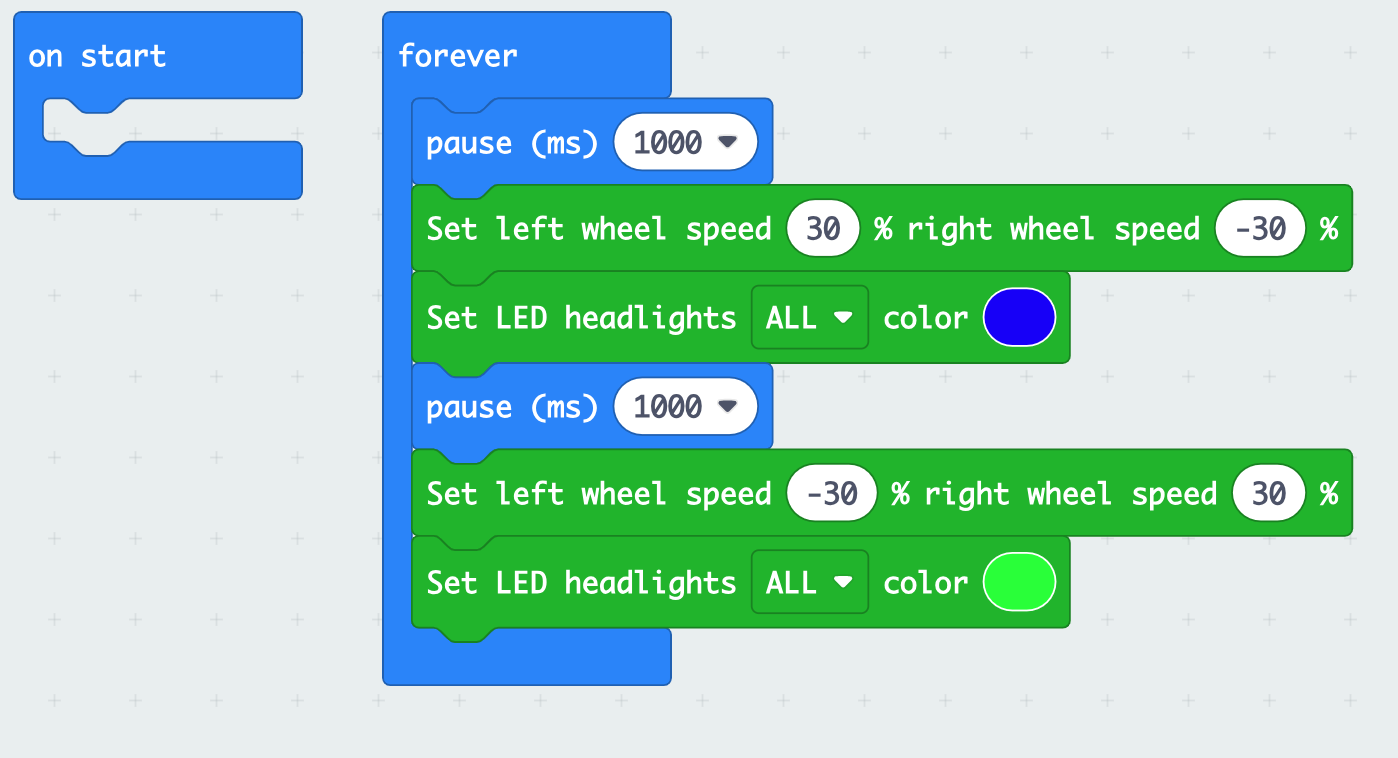
Let's create a really simple program. Remember when we named the new project "Dizzy Bot?" Well, now you get to find out why. Using the "Basic" and "Cutebot" block groups create this program:
Download the program to the Micro:bit. If the Cutebot does not move, be sure that the switch is turned on.